Photobucket Photobucket
Showing posts with label History and Stories. Show all posts

November 1, 2012

Berry Zucchini Jam

Before my Mom passed away back in July, she and I spent some time going through her recipe box, so that she could share with me some of her favorite recipes.  Mom had lost most of her ability to speak, but she could always get her point across to me, and with all the 20 questions I asked her and much laughter, we were able to figure out what she wanted to express about each of the recipes. We had a lot of fun, and I will treasure this memory.
She said this particular recipe was a favorite when we were young kids, it was fast and inexpensive, the perfect combination for a mom with a young (and naughty) family. 
After she died, I spent even more time going through her recipes, marking the ones I remember, and setting aside many that I want to try in the coming months.

This is the first of those recipes. I made this while the zucchini were in abundance and I could beg some from my girlfriend Kylee (I don't garden either). My family were crazy for this stuff, so I count this a successful result.

BERRY ZUCCHINI JAM
4 c. zucchini, peeled and grated
1/2 c. lemon juice 
(mom always used reconstituted juice)
1 pkg. Pectin
2 pkg. unsweetened punch mix 
strawberry or Raspberry 
(such as Kool-aid) 
8 c. sugar

In a large stockpot add the peeled and grated zucchini, lemon juice, pectin, and punch mix.  Bring to a full boil (at first it seems like there is not enough liquid to boil, but as the zucchini heats, it breaks down, adding a lot of water).
Add the sugar, return to boiling, and continue boiling for 5 minutes.
Immediately pour into clean pint jars, and seal according to your canning methods.

This is the original recipe, in my mom's handwriting.
I am not a person who does any canning, so this was actually challenging for me, so here are a couple of small things I discovered.
If you choose Mixed Berry flavored punch powder, you will have blue jam.

 I added red food coloring to get to a deep purple color, which was definitely more appetizing than the lovely blue I started with.
As the jam boils, it develops a yucky foamy stuff on top.  I had to skim this off with a large spoon. 
I used 1/2 pint jars instead of the 1 pints that my mom always used (because that is the size I had on hand). Worked great. And the best thing?  Every one of my jars sealed! I was very proud of myself.  A real Suzy Homemaker here!


Pin It

May 24, 2011

Billy Goat Cookies

I have been sorting through my mom's recipes, trying to organize them and create an easier storage system.
This has turned out to be such fun!  We have run across recipes that bring back memories from my childhood, and laughed over some of the disasters we both remember.
But the really great thing about this endeavor are the treasures I have uncovered some REALLY OLD recipes that belonged to my grandmother, her sister and friends, and some long lost recipes belonging to Aunt Peg!
So many of the recipes I have gone through are simply fun to read.  The cooking styles and descriptions are sometimes confusing or really old school, and is giving me some challenges in deciphering everything, but I love it!
These Billy Goat Cookies are one of the recipes that had belonged to my grandmother Iola.  My mother (who is 75) remembers her mom making these when she was a little girl!  We don't know how these cookies came to be called Billy Goats but just following this old recipe handwritten by my grandma was sheer joy.
The original recipe in my grandma's handwriting.  Obviously well used.  I love her short hand directions!
Billy Goat Cookies
1 1/2 c. brown sugar
1 c. melted shortening
3 eggs, room temperature
1/2 c. warm water
1 tsp. baking soda
1 tsp. vanilla extract
1 pinch salt
3-4 c. flour
2 c. chocolate chips, chopped nuts, or raisins
(or a combination of the 3-whatever your family would like)
Preheat oven to 350 degree's.
In a large mixing bowl combine the brown sugar and melted shortening.  Beat on medium speed for 2-3 minutes.  Add eggs 1 at a time, and beat well after each addition.
In a measuring cup combine the warm water and baking soda.  Stir until the soda is dissolved. Add to the sugar mixture.  Beat again until well combined.  The batter will be very thin.


Add the vanilla and the pinch of salt.
Add the flour to the batter about 1 cup at a time, and mix well after each addition. Add enough flour to make a stiff dough.  Stir in chocolate chips, nuts and raisins.
Drop by teaspoonfuls onto parchment lined baking sheets.

Bake for 13-15 min.
Cool on wire rack and store in a covered container.


 As you may be able to tell, I only used chocolate chips in my cookies. We aren't fans of nuts or raisins...

January 28, 2011

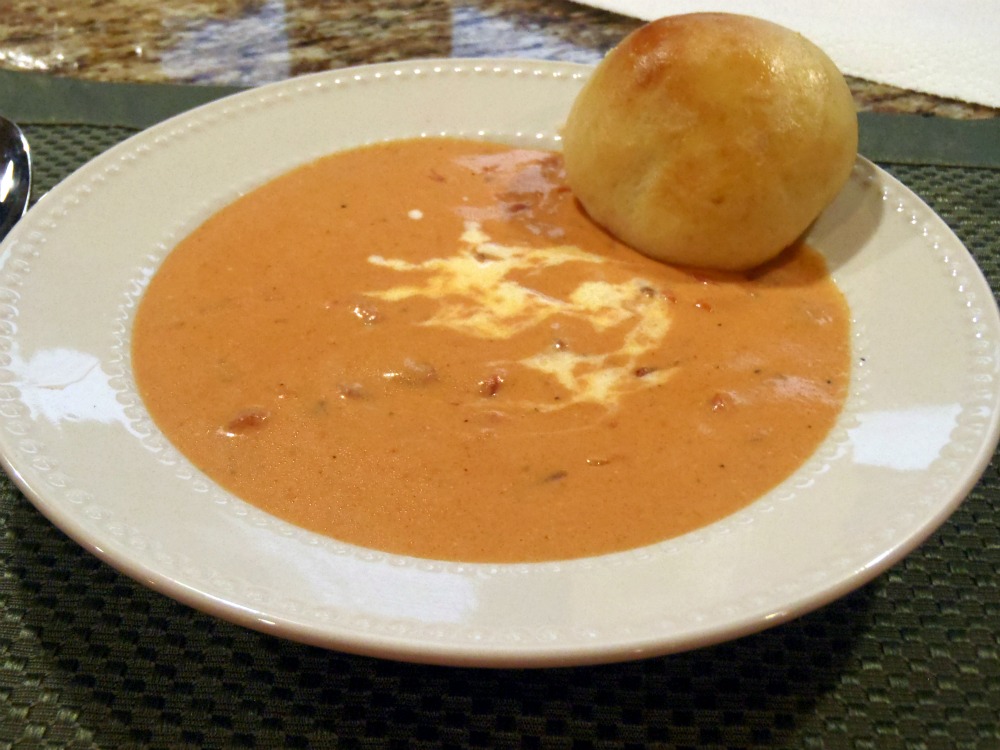
Creamy Tomto Soup

Last evening I made my favorite comfort food meal. With cold weather all around us I thought it would be nice to re post one of my very favorite recipe's...

I have always had a bit of an obsession with Tomato Soup. When I was 9 years old I even begged my mother to make me  tomato soup for Thanksgiving dinner! I love tomato soup so much that back when I was a bride-to be my Aunt Peg gave me  48 cans of Campbell's Cream of Tomato Soup at a bridal shower!
So, even though this recipe didn't originate with Aunt Peg, it's one of my fast and favorite meals, and when I shared this recipe with her she was crazy for it too!

CREAMY TOMATO SOUP
1-(10 3/4 oz.) can condensed tomato soup
1-(15 oz.) can petite diced tomatoes
1-(8 oz.) package cream cheese, softened and cut into 8 pieces
1 small onion, finely diced
1/4 c. butter
1 1/2 c. milk
 In a large sauce pan melt the butter, add the diced onion and saute until onion is translucent.
  Add the condensed tomato soup, canned tomatoes, and milk.  
Heat until simmering.
  Add in the cubed cream cheese, return to a simmer and whisk until cream cheese is melted and completely incorporated.
Ready to serve!
NOTE:  The soup thickens significantly as it cools, so when reheating any leftovers you may want to add more milk.

This a very satisfying, creamy soup and it is the ultimate comfort meal if you serve it with 
my 30 MINUTE ROLLS,
QUICK CORN BREAD
or  these 
GRILLED CHEESE SANDWICHES FOR GROWN UPS

Originally posted 3/21/2010

January 27, 2011

Epic Bread Quest... baking bread = failure #2!

Here's my second post on my quest to bake a great loaf of bread... and more failure!  
First off, I have to say that I had a wonderful recipe from a great blogger and she also provided me great tips to work with.  Apparently I can't follow written or verbal directions :(.
The recipe is courtesy of 
and the name of her recipe is:

Now you may be asking what happened?  I have that same question swimming in my head too!  As usual the dough started out great, but it never raised to the height I thought it should, but hey... I put them in the oven after waiting SEVERAL hours for the loaves to 'double in size" (I'm beginning to think this is a myth that accomplished bakers say you must obtain just so they can laugh at us fools). OK, back to the oven, I placed them in the oven, set the timer, and because the loaves need to bake about 40 minutes I went back to make some jewelry (no wasted time for me!).  I could smell the bread baking, and my stomach was rumbling, I was imagining the huge pat of butter I was going to put on that first piece of hot sliced bread!
Making jewelry...some computer work...edited a couple of photo's...sorted some jewelry orders...what is that smell?  Is something burning?  AUUUUUGGGGGHHHHHH!  I didn't hear the timer! My bread had been in the oven over an hour!!!!!!!!!!
Can you say...
Maybe a SLIGHT exaggeration.

pause for this safety tip
Well, I couldn't bring myself to actually post pictures of the results from this episode of the epic bread quest, I do have my pride, and I know you get the gist...
I am going to persevere!  I will try this recipe again, and let you know...  But check out Pam's blog and browse her recipe's-they are awesome!
I swiped this cartoon, don't tell on me-it's just soo fitting!!!

October 10, 2010

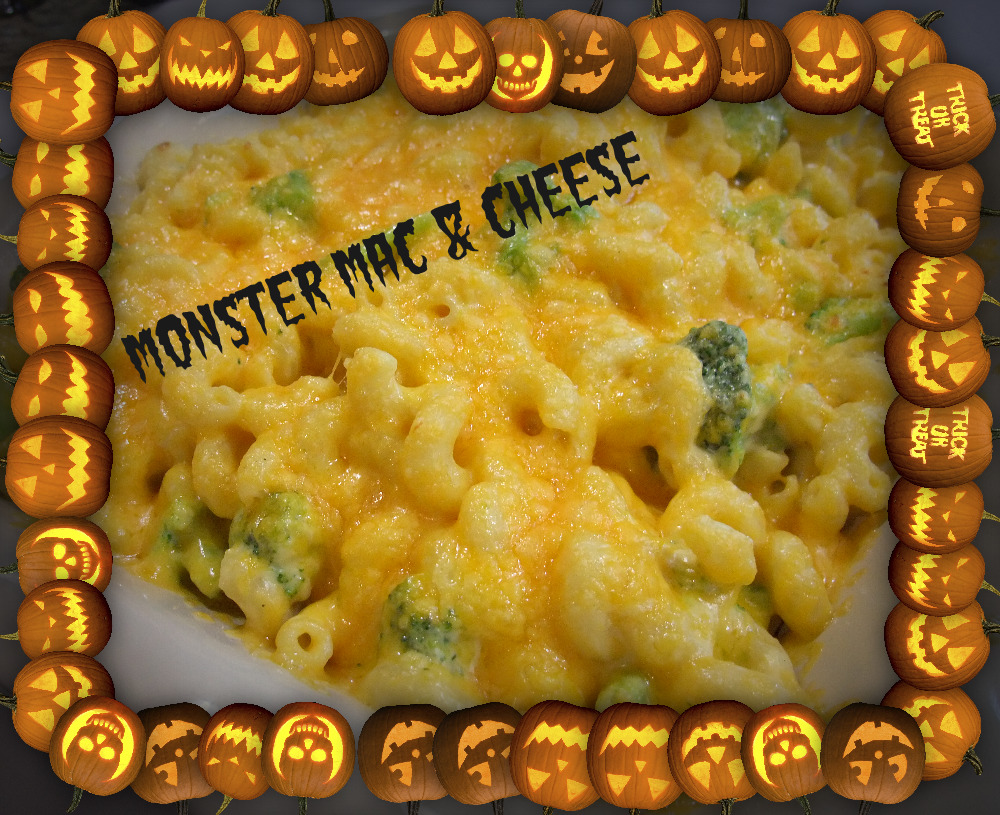
Monster Mac and Cheese

My family are big fans of Mac & Cheese!
Just for my family, on Sunday's for the next few weeks I will be posting one of their favorite Mac & Cheese recipe picks.

Disclaimer: Mac and Cheese is not my biggest love, but there are some really great recipes that just make you say YUM! 
 
This recipe is one that I made often for my kids when they were small, and I always made it at Halloween time. Any food with the word monster in it was sure to make them happy!  I don't really know why this dish is called Monster Mac, but adding green food coloring to the sauce would make my wee people giggle all through dinner 'cause they were "eating monster guts". Gross I know...

12 oz. Cavatappi pasta
10 oz. bag frozen broccoli florets, thawed
1- 16oz. jar Alfredo sauce
8 oz. cheddar cheese, shredded-about 2 cups
(I admit that I always add extra cheese)
1/3 c. milk
1 Tbsp. Worcestershire sauce
3/4 tsp. Italian seasoning spice
1/4 c. pepper
4-5 drops green food coloring (optional)
Coat a 2 qt. baking dish with cooking spray.  Cook pasta according to package directions, adding the broccoli to the boiling pasta during the last 3 min. of cooking time. Drain.
Meanwhile, position your oven rack to 4" from the broiler source, and preheat broiler on high.
Return the pasta/broccoli to the pot, and over low heat stir in the Alfredo sauce, milk, Worcestershire, seasoning and pepper. Add 1 c. shredded cheese. Stir until smooth and heated through.
Transfer the pasta mix to the prepared baking dish, and sprinkle with remaining 1 c. cheese. Broil until the cheese is melted and just starts to brown, about 3-4 minutes.
Tip: Don't rinse the pasta after draining it, the starch helps thicken the sauce a bit more.


(Now that my kids are grown, I just couldn't bring myself to color the pasta green...sorry!)
Special note: Cavatappi pasta is a large corkscrew pasta that I always use when making a recipe with a heavier sauce. Everything just clings to it so well!  However you can use penne, elbow, or rigatoni pasta in place of the cavatappi if you can't find cavatappi at your grocery store.

Pin It

August 10, 2010

**Sparkling * Pineapple * Punch**

An oldie but a goody recipe!  I'm back at our annual family Christmas party, waiting for Santa to drop by and give me a candy cane while I sit on his lap posing for a picture that my mom can't seem to take because the "camera isn't working right". LOL
Good times!
This punch recipe feeds a crowd, but is easily cut in 1/2 for smaller gatherings.
(this is not a picture of the actual punch mix, it's a photo I "borrowed" from a google search, but it's a pretty close match!) 
SPARKLING PINEAPPLE PUNCH

2 (12oz.) cans Frozen lemonade concentrate
9 c. Cold water
1 (46oz) can Pineapple Juice
1 (29oz.) can Pears, pureed in blender
1 (16oz.) can Pears, pureed in blender
32 oz. Lemon-lime carbonated beverage (such as Sprite or 7-Up)
1/2 gallon Pineapple Sherbet
In a LARGE mixing bowl combine the first 5 ingredients. Soften sherbet, then stir into punch mix.  CHILL WELL.  Just before serving add the lemon-lime beverage.
Makes approximately 9 quarts.

(You can also freeze this drink before adding the lemon-lime soda. Just allow the frozen mix to soften well before adding the soda and then serving.)
There are tons of options for changing this punch mix up...add fresh strawberries, add canned peaches instead of pears, use orange soda instead of lemon-lime...imagine...create!

This post is linked up over at:
Sumo Sweet Stuff

March 21, 2010

~~OPENING OUR RECIPE BOX~~


Welcome to our recipe box!


Aunt Peg's Jewelry was named in honor of GERADINE PEGGY HALL WRIGHT BLONQUIST.  An amazing woman who inspired everyone around her!
As Peg's niece I have felt her influence throughout  my entire life in so many different ways, and when I introduced Megan to my Aunt Peg, Meg immediately became "one of the nieces" (as Peg used to say).
She was a funny, crazy, beautiful, kind, generous, inspiring, dedicated, hard working mother who somehow found time to cook, work, raise 3 children, keep an immaculately clean home,  visit friends and neighbors, arrange parties, and still find time to make every person she came in contact with feel like they were the most important thing in her world. In other words, a perfect woman! Oh, and did I mention her fame as a master Divinity Maker? I still can't make candy that even comes close to comparing...
One of the many cherished memories I have of Aunt Peggy is her wonderful food. She made fabulous, comfort foods that she learned from her mom, and created with her 2 sisters Leona & Sally (Sally is my sweet mom). These women were the go to gals whenever you needed anything, recipes, babysitters, sewers, knitters, first aid, gift idea's, a quick education on any subject, or just a shoulder to laugh and cry on.
THE HALL GAL'S!
THE FANTASTIC FOUR!
Left to Right:
Grandma (Iola), Aunt Peg, Aunt Leona, Sally (my mom)

This picture was taken @ Aunt Peg's wedding to her second husband (she was widowed after 3 years of marriage, just 6 WEEKS after her second child was born). This photo was taken in Park City Utah, 1957.
A few years ago my cousins and I put together a book with the recipes that have been handed down to us by these wonderful women, as well as those recipes that have become the "family" favorites within our own tiny dynasties...
Meg and I think many of you will like these recipes and that hopefully you will be inspired to share with us your favorite recipes as well!!
We wan to make this blog the place for all of your old and new favorites!